Tools Required: Philips ScrewdriverThe front battery door cover helps secure and protect your sprayer's battery during operation and transport. If the cover becomes damaged, loose, or no longer latches properly, replacing it can help ensure the battery remains protected and securely in place. This guide will walk you through the steps to remove the existing battery door cover and install a replacement quickly and safely.
Watch:
Step-By-Step Instructions:
STEP 1: Detach the Battery Door Assembly
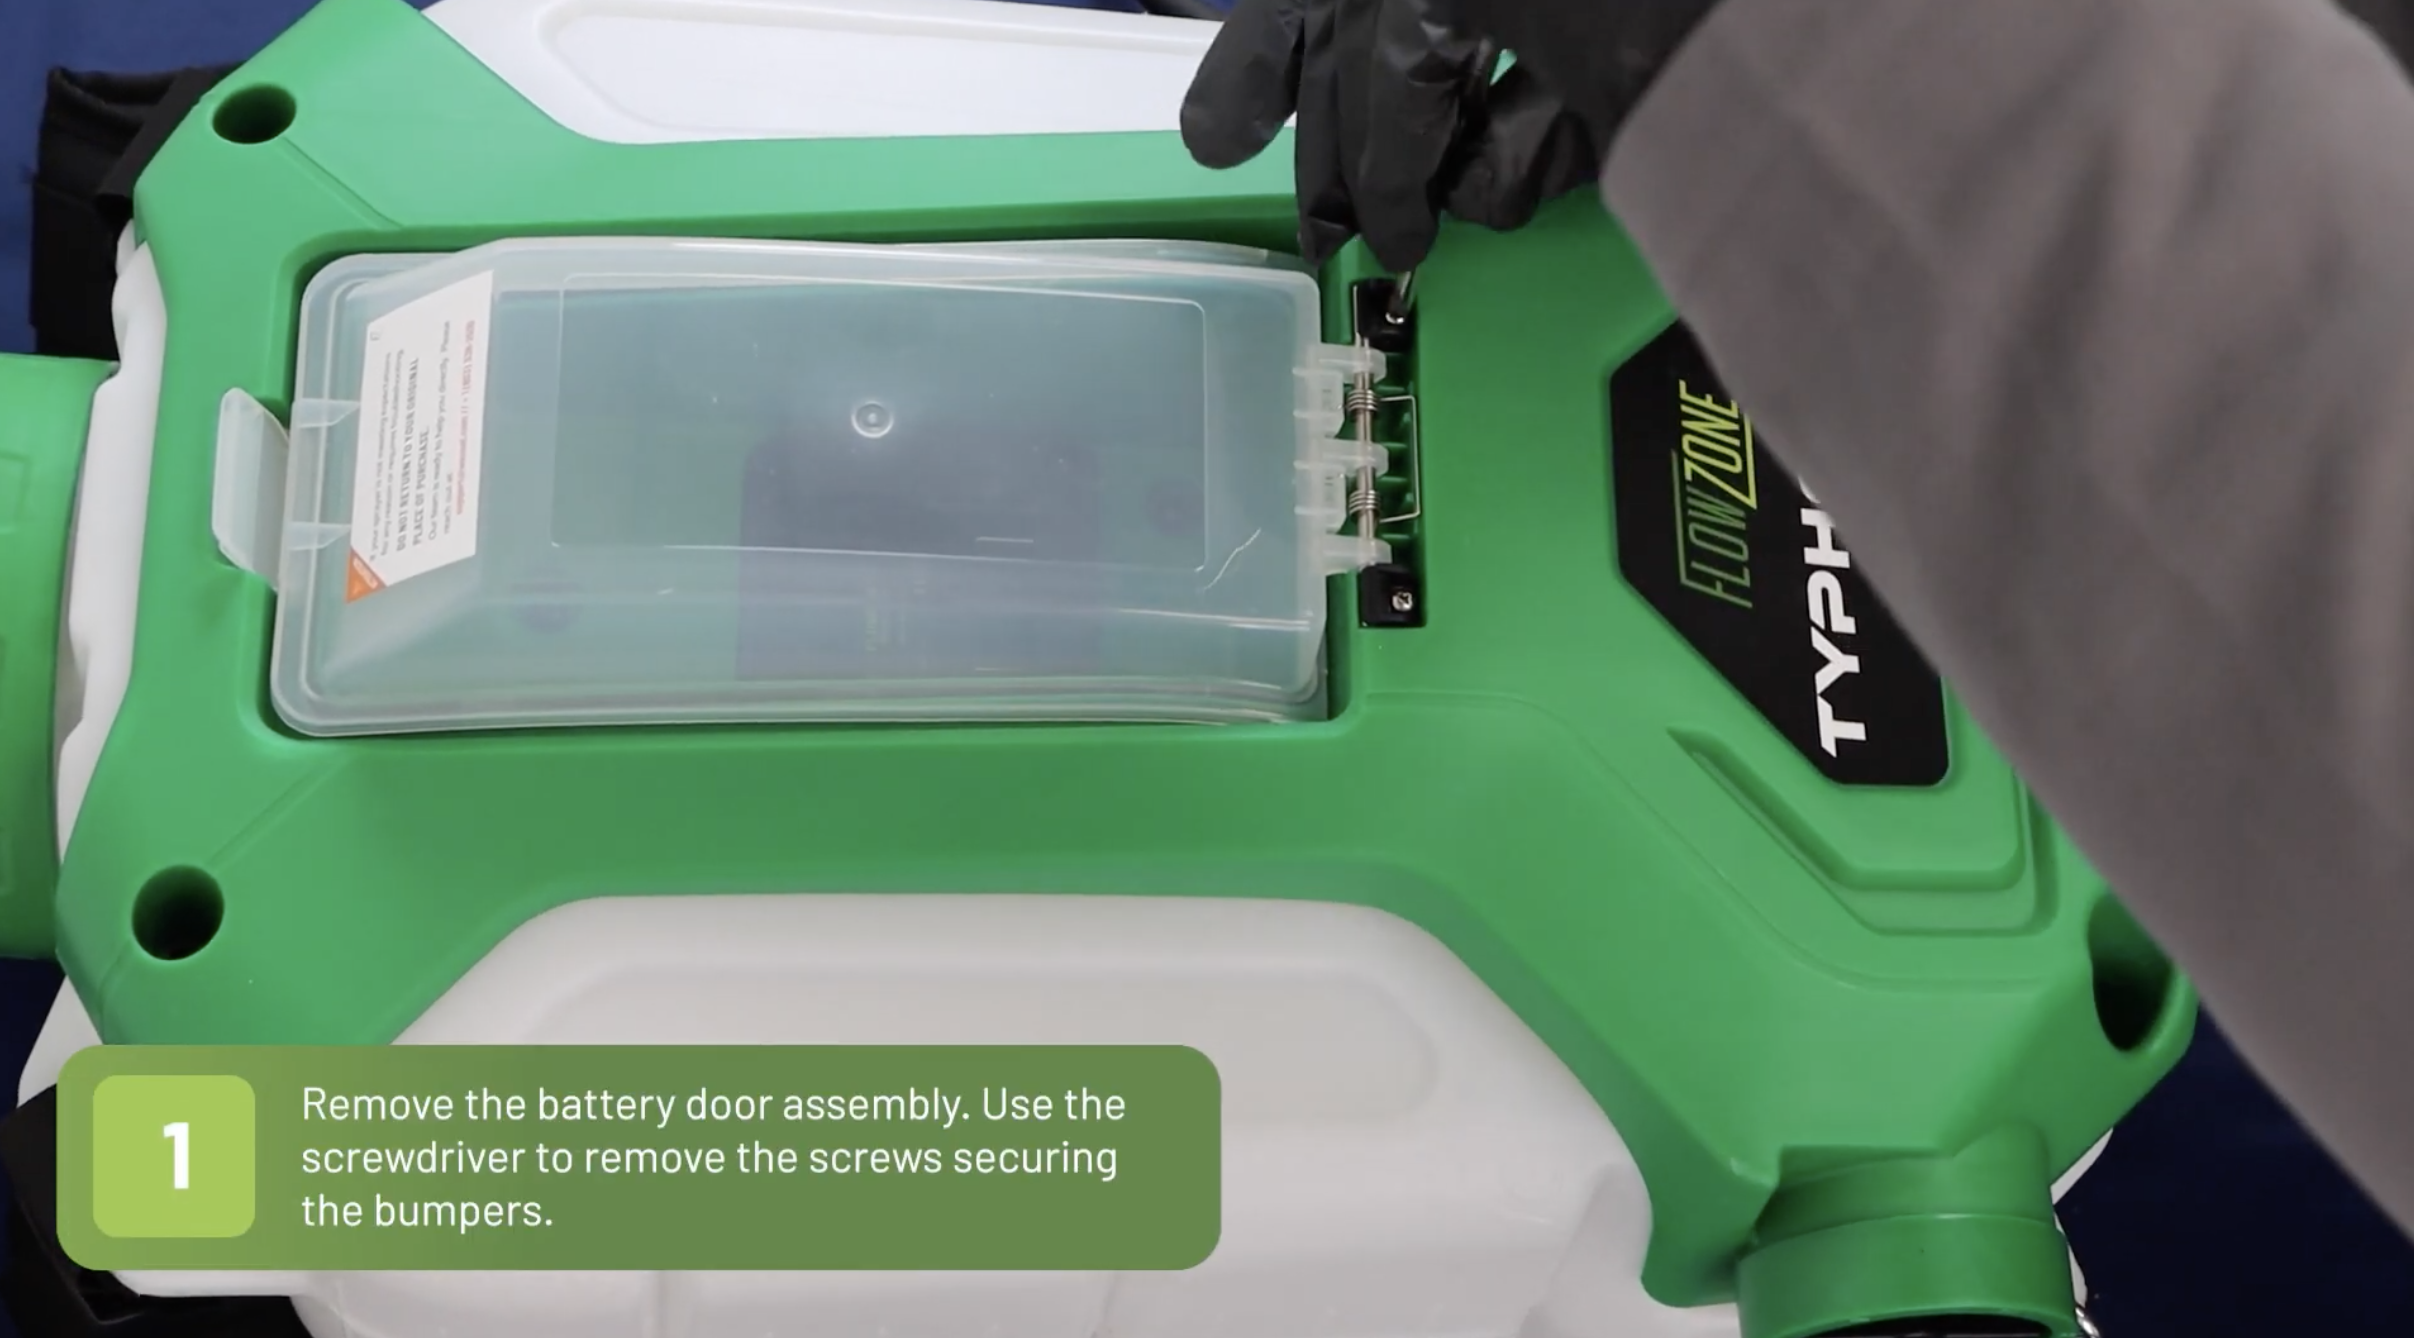
Take the screwdriver to loosen the screws that are securing the bumpers on either side of the spring and rod.
STEP 2 : Remove the Existing Battery Door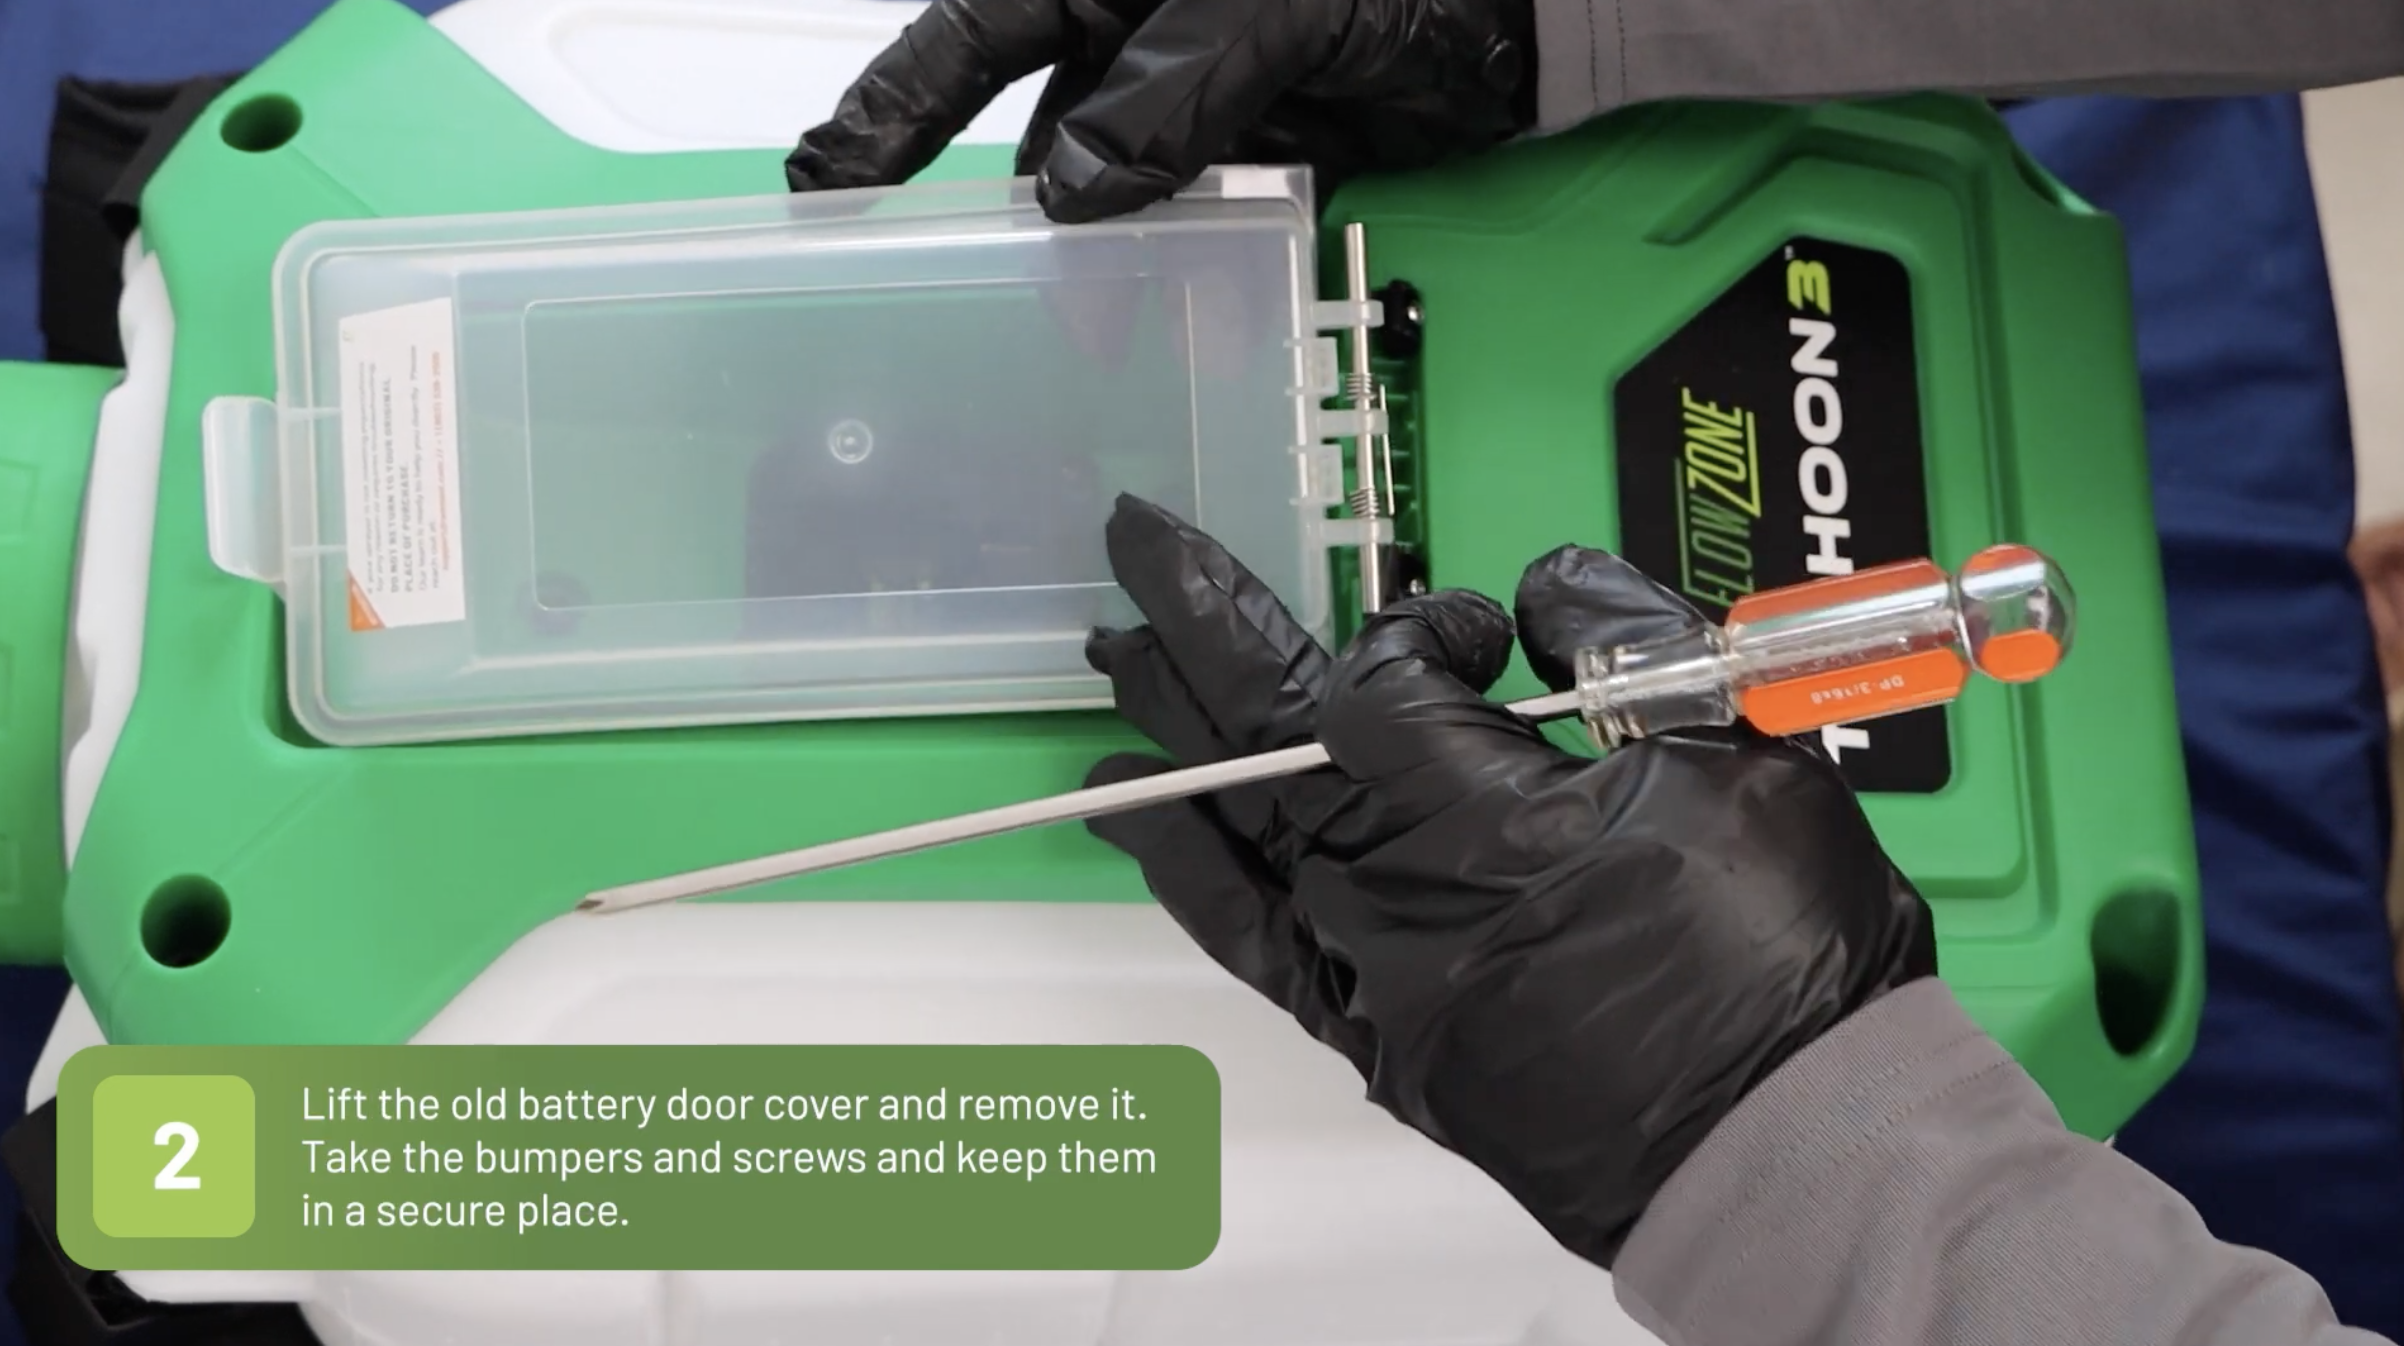
With the screws out, you will now be able to remove the battery door cover.
Note: If the replacement battery door assembly does not include a spring and rod, keep the ones from the existing battery door cover.STEP 3: Assemble the New Battery Door
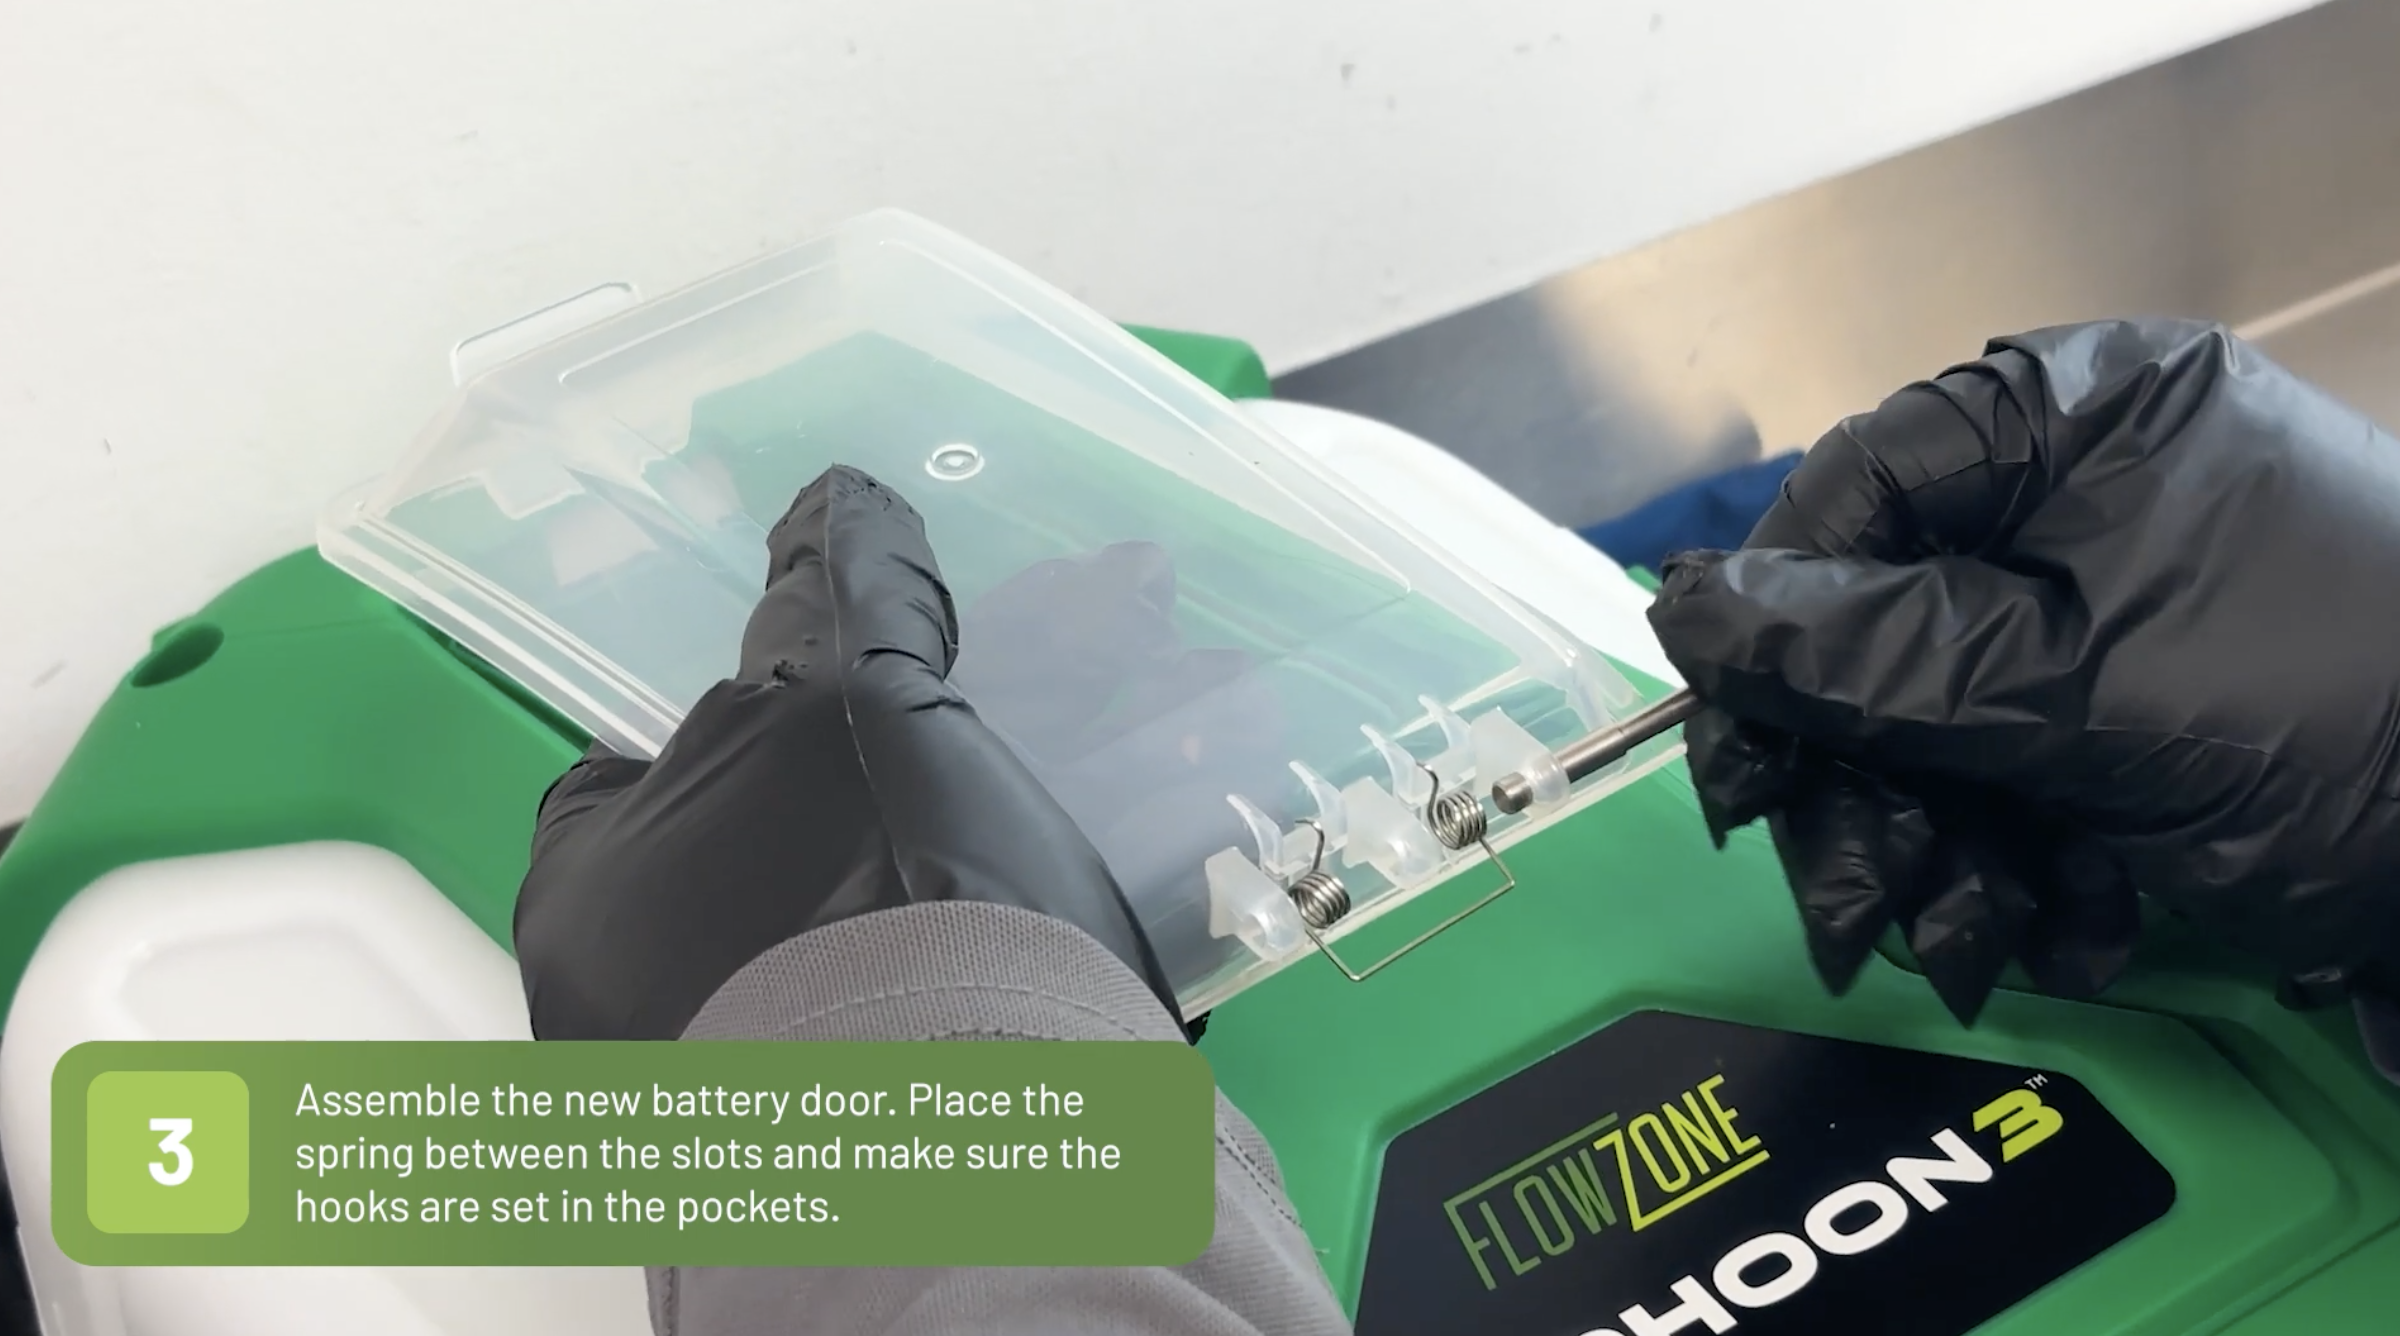
- Place the spring between the slots and place the hooks in the pockets on the battery door.
- Slide the rod through the slots and the springs on the battery door.
STEP 4: Attach the New Battery Door to the Sprayer
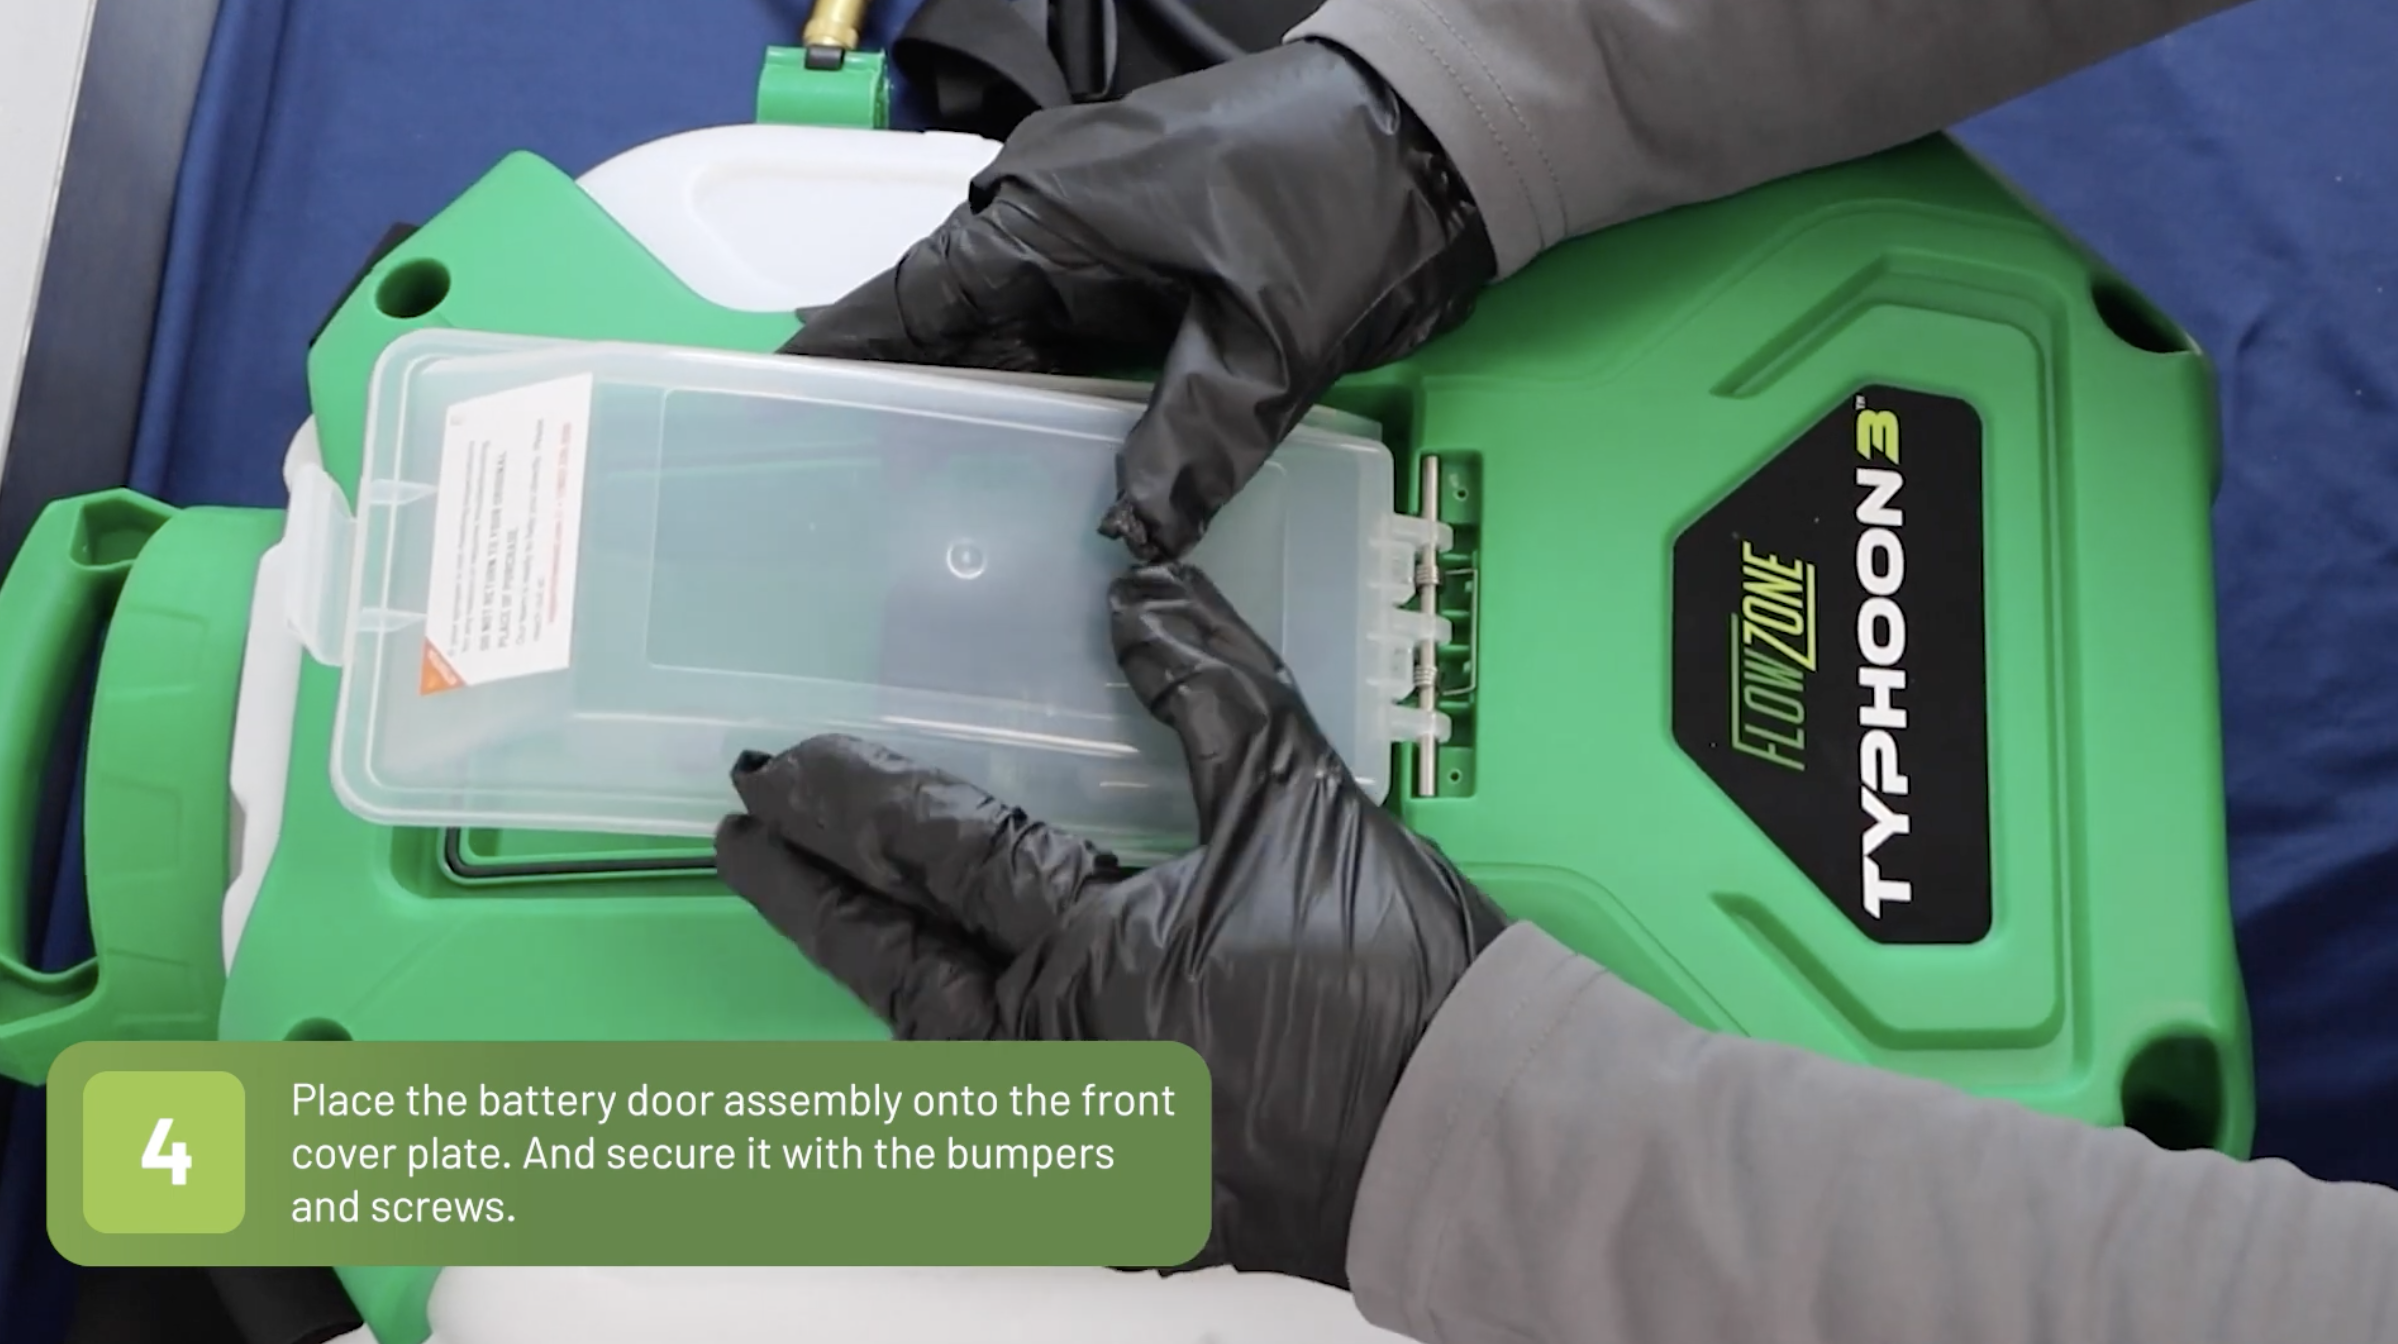
- Put the new battery door assembly on the front cover plate. Make sure that you align the spring and rod correctly.
- Secure the battery door with the bumpers and screws.
Was this article helpful?
That’s Great!
Thank you for your feedback
Sorry! We couldn't be helpful
Thank you for your feedback
Feedback sent
We appreciate your effort and will try to fix the article